Tools
Tools are listed in the left column of the Landing view. They're different from editors: an editor changes game data in the ROM, while a tool works with the project itself. Tools edit project metadata such as labels and ROM/RAM value tables, or act on the built game, as Publish and Run do.
 Project Settings
Edits the project's description, author, and link, shows when it was created and last edited, and sets the project-wide default tint variant. All of its fields are described under Settings › Project Settings.
 Publish
Copies the project's built ROM to your Documents folder as <project name>.nes,
replacing any existing file with that name. A toast message reports the result.
- ROM projects:
workrom.nesis always current, so it's copied as is. - Disch projects: if
workrom.nesis missing or older than your last save, the app assembles it from theasmsource first. - Anomie projects:
workrom.nesis written from the project's listings first.
If the build or the copy fails, the message says why, and nothing is overwritten.
 Run
Builds the ROM if it's out of date, the same way Publish does, then launches the program set in
App Settings › Run, with %1 in its parameters replaced by the
quoted path to workrom.nes. The app doesn't wait for or watch the launched program. It's a one-shot
launch, so you can keep editing while the game runs.
If no executable is set, or the build or launch fails, a toast message explains what to fix.
Run uses the project's own workrom.nes, so you can test without publishing. Many emulators reload the
file when it changes, which makes save-and-rerun quick.
 Labels
Edits the names the editors show for things that have no in-game name, such as maps, tilesets, shops, battles, enemy AI scripts, teleports, treasure chests, sprites, and backdrops. Labels are project data, not ROM data, so renaming a map here changes what the Local Maps editor shows, not the game.
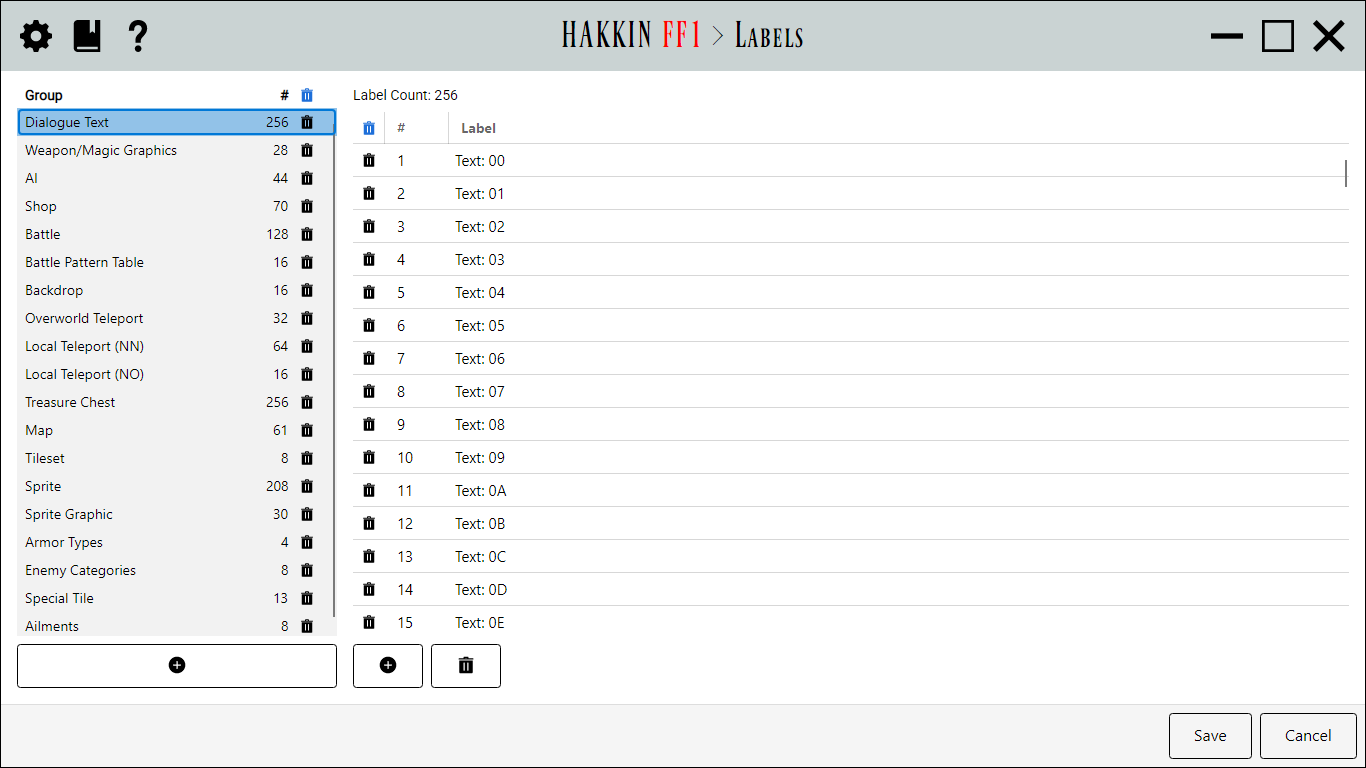
Categories
The left list shows every label category with the number of labels in it. Click the add button below the list to create a category of your own (you'll be asked for its name). Categories you've added are shown in blue. To remove a category, click its trash icon once to arm it, then again to confirm.
Labels
The right grid lists the selected category's labels, numbered by index. Double-click a label, or press F2 or Enter, to edit it; Tab moves to the next one. Below the grid, Add Label appends a new label and Remove Selected deletes every selected row (after a confirmation). Each row also has its own arm-then-confirm trash icon.
Changes take effect as you make them. Cancel reverts all of them, and Save keeps them.
 ROM Values
Edits the project's ROM Values table: the named addresses and counts that tell the editors where each kind of game data lives in the ROM and how big it is. Examples are where armor data starts, how many weapons there are, and how wide one enemy record is. These describe the ROM layout rather than the game data itself. You'd change them for a hack that moves or resizes data, so the editors read from and write to the right place.
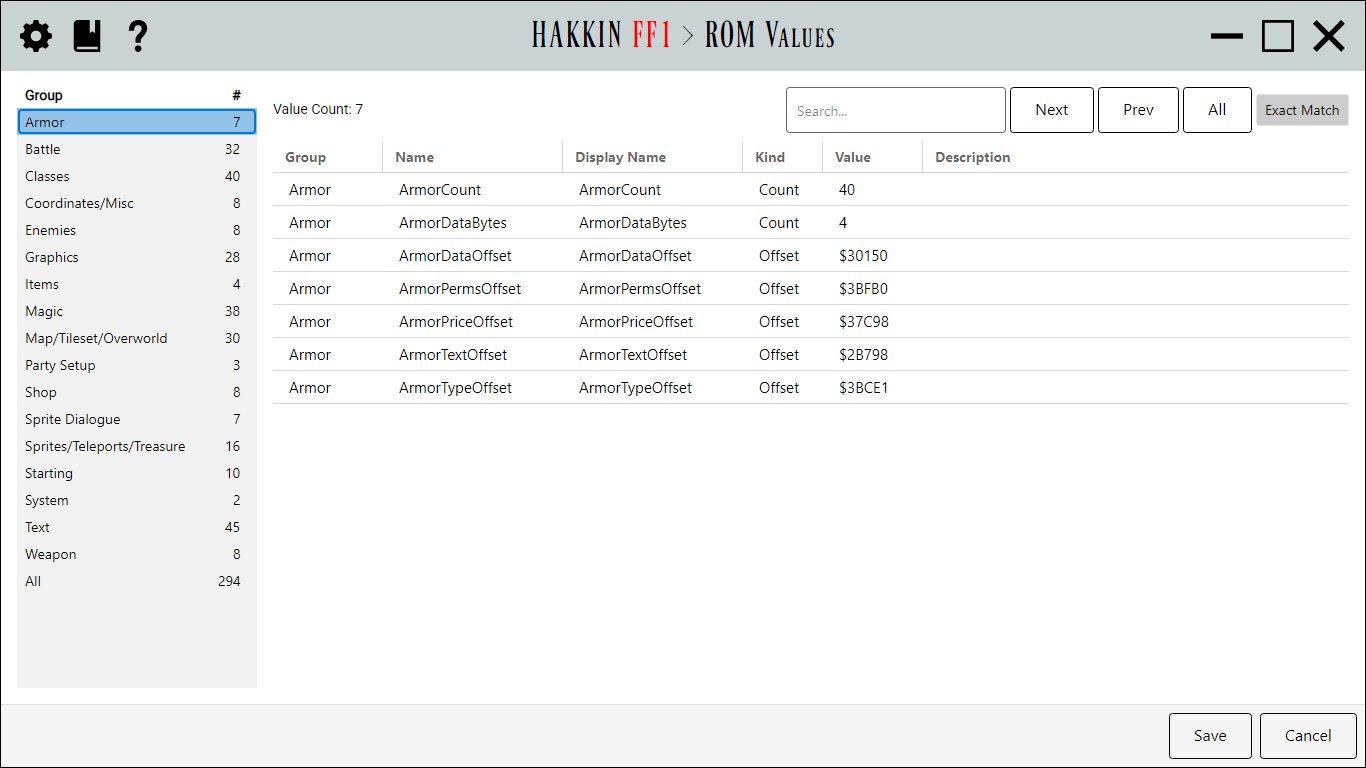
The left list shows the value groups (for example Armor, Weapons, Text), each with its count. It's read-only: groups come from the app and can't be added or removed. Selecting a group shows its values in the grid on the right:
| Column | Detail |
|---|---|
| Group | The value's group. Read-only. |
| Name | The value's fixed identifier, which the editors look up. Read-only. |
| Display Name | A friendlier name for the value. Editable. |
| Kind | Offset for an address in the ROM, or Count for a quantity: a number of records, or a width in bytes. Read-only. |
| Value | The address or count. Editable. |
| Description | Notes about the value. Editable. |
Above the grid is a search box. Next (F3) and Prev (Shift+F3) step through matching rows, and All selects every match. Exact Match requires a whole cell to match; with it off, partial matches count. Searches ignore case either way.
 RAM Values
A list of named 6502 RAM addresses for the project, used wherever the app needs to refer to game variables in RAM. Unlike ROM Values, this list is entirely yours to manage: you can add, edit, and delete entries.
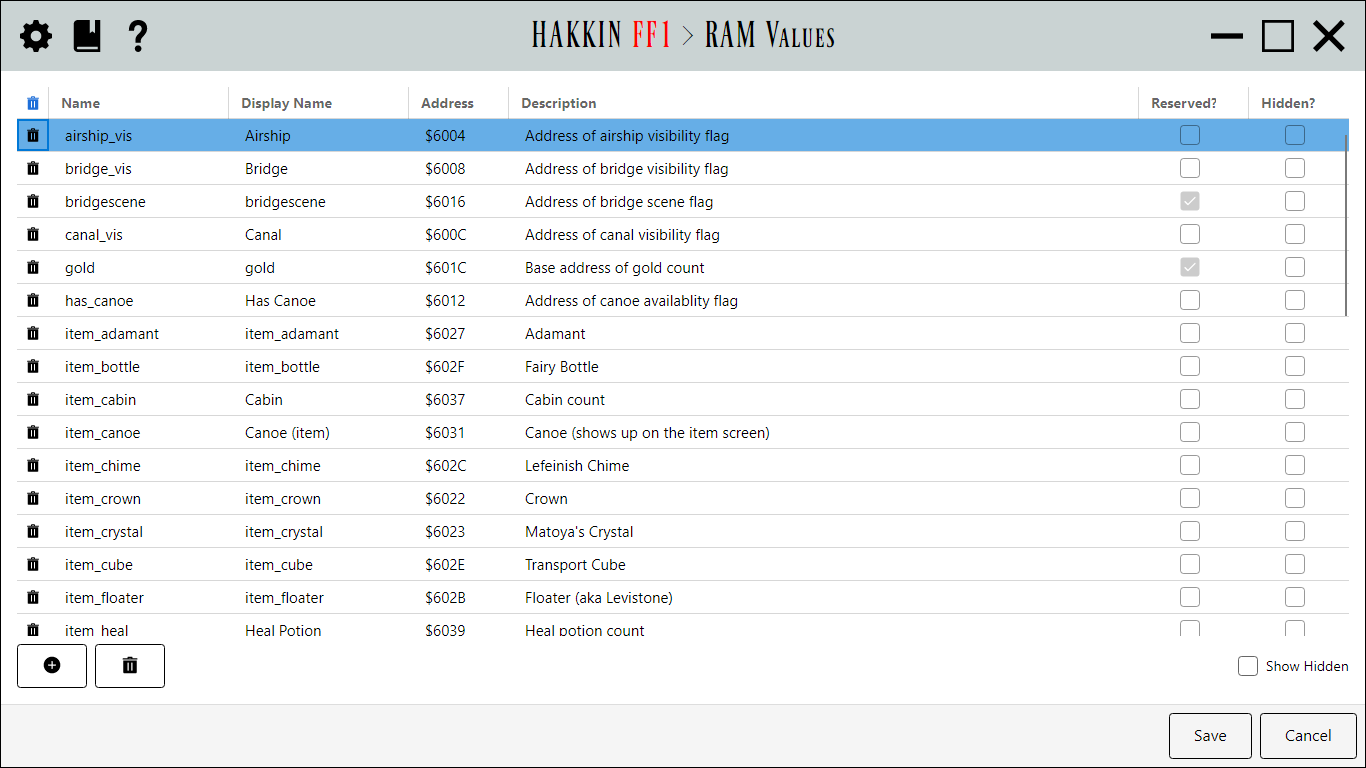
| Column | Detail |
|---|---|
| Name | The entry's identifier. |
| Display Name | A friendlier name. |
| Address | The RAM address. |
| Description | Notes about the entry. |
| Reserved? | A reserved entry can't be deleted. |
| Hidden? | Hidden entries are only listed while Show Hidden is checked. |
Below the grid, Add RAM Value asks for a name and adds an entry, and Remove Selected deletes the selected rows after a confirmation. Each row also has its own arm-then-confirm trash icon.
 Reorder Tools overlay
Opened with the icon next to Landing's Tools heading.
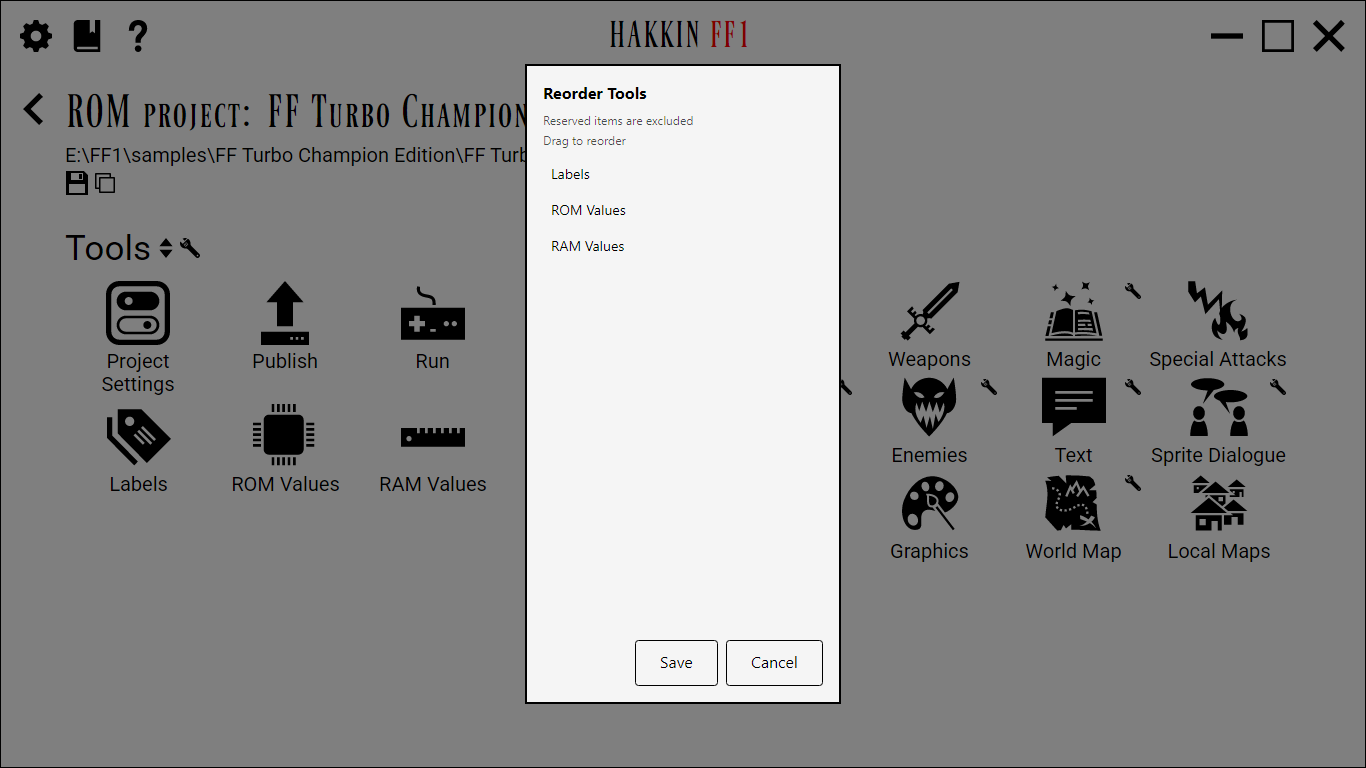
Drag tools up and down the list to set the order they appear on Landing, then click Save.
Cancel leaves the order unchanged.
Project Settings, Publish, and Run always stay at the top of the Tools list, so they aren't shown here. The overlay notes this with Reserved items are excluded. The order is saved with the project.
 Select Tool Modules overlay
Opened with the icon next to Landing's Tools heading.
It lists every tool slot and the module behind it. A slot can use the built-in tool, a replacement from an extension,
or be excluded, which hides its button from Landing.
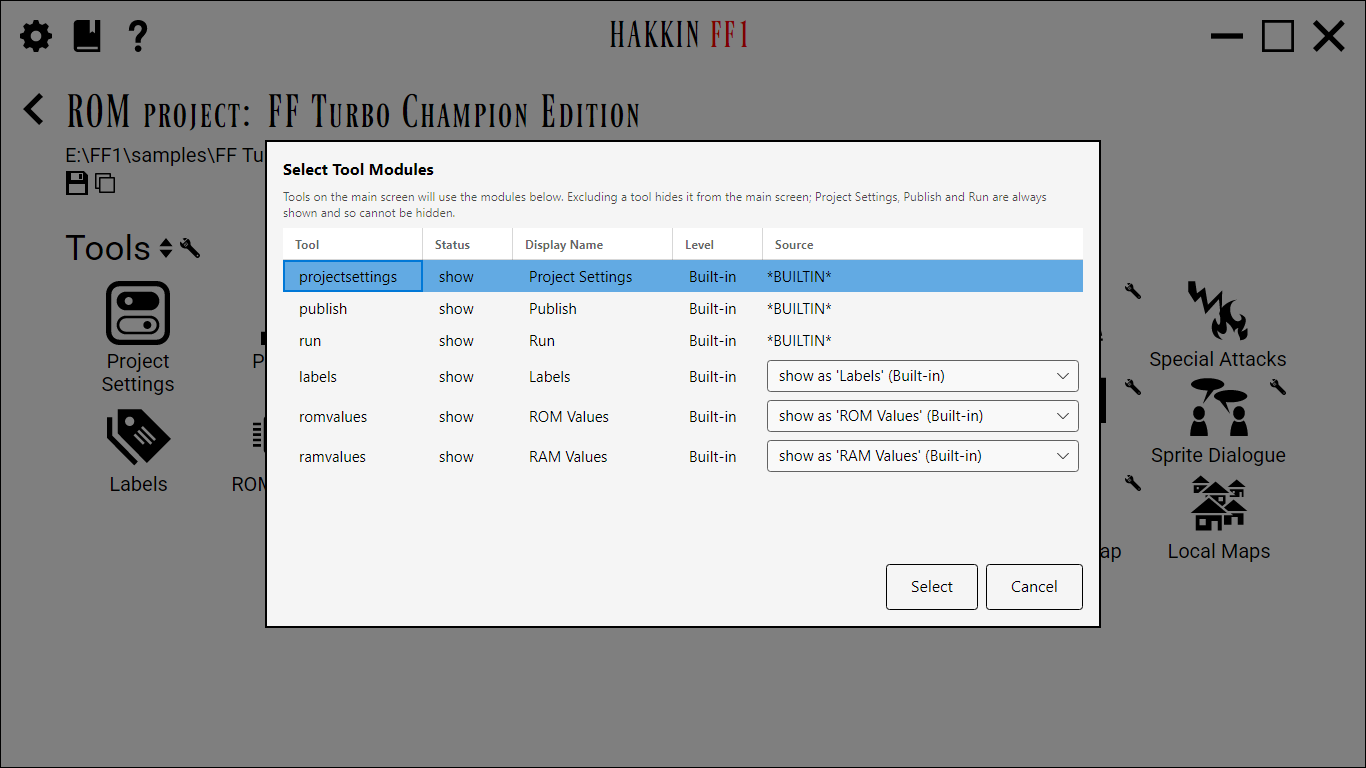
| Column | Detail |
|---|---|
| Tool | The slot's name, for example publish or labels. |
| Status | show or hide (excluded). |
| Display Name | The label the slot's button will show. |
| Level | Where the module comes from: Built-in,
App (shared from <app folder>\extensions), Project
(the project's own extensions folder), Custom (anywhere else), or
Excluded. |
| Source | A dropdown for slots with more than one option; otherwise the module's location as plain text. |
Click Select to apply your choices to the project, or Cancel.
- Project Settings, Publish, and Run can be replaced by a module, but never hidden.
- Installing an extension never changes an existing project on its own. A tool slot that a new module introduces starts out hidden; opting in adds it to the end of the Tools list.
- If a project's chosen module goes missing, its slot falls back to the built-in tool and tells you so the first time you click it.